Master Grafana Email Alerts: Your Ultimate Setup Guide
Master Grafana Email Alerts: Your Ultimate Setup Guide
Hey there, monitoring enthusiasts! Today, we’re diving deep into a topic that’s absolutely crucial for anyone running a robust observability stack: Grafana email alerts . Seriously, if you’re not getting timely notifications about critical issues in your systems, you’re essentially flying blind. We’re talking about preventing downtime, catching performance dips before they impact users, and generally keeping your infrastructure happy and healthy. This isn’t just about setting up a few rules; it’s about building a proactive monitoring strategy that empowers you to react quickly and intelligently. So, buckle up, because we’re going to walk through everything you need to know to get your Grafana email alert setup dialed in perfectly. From the fundamental ‘why’ to the nitty-gritty ‘how-to,’ we’ve got you covered. By the end of this guide, you’ll be a pro at crafting effective Grafana email alerts that genuinely add value to your operations, saving you from those midnight panics or, worse yet, completely missed incidents. Let’s make sure your Grafana instance isn’t just a pretty dashboard, but a powerful guardian watching over your systems 24 ⁄ 7 , ready to ping you the moment something needs your attention. This comprehensive guide will ensure you understand every aspect of the process, transforming your monitoring from reactive firefighting to proactive problem-solving. We’ll cover everything from the basic requirements to advanced best practices, making sure your Grafana email alerts are not just functional but truly effective .
Table of Contents
- Why Grafana Email Alerts Are Your Monitoring Superpower
- Getting Started: Prerequisites for Grafana Email Alerting
- Step-by-Step: Configuring Grafana Email Alert Channels
- Crafting Your Alert Rules: When, What, and Who Gets Notified
- Best Practices for Effective Grafana Email Alerting
- Conclusion: Empowering Your Monitoring with Grafana Email Alerts
Why Grafana Email Alerts Are Your Monitoring Superpower
Alright, guys, let’s kick things off by talking about why Grafana email alerts are so incredibly vital to your operations. Think of it this way: dashboards are awesome for visualizing data and understanding trends, but they’re largely reactive. You have to look at them to get information. Email alerts, on the other hand, are proactive. They come to you when something demands your attention, allowing you to catch issues the moment they happen, or even better, before they spiral out of control. This proactive approach is the cornerstone of effective system management. Imagine a critical database starts experiencing high latency. Without proper Grafana email alerts , you might only notice it when users start complaining, or worse, when the system completely grinds to a halt. By then, the damage is already done, and the scramble to fix things is stressful and costly. With Grafana email alerts , that latency spike triggers an immediate notification, giving your team the heads-up needed to investigate and mitigate the problem before it becomes a crisis. This translates directly into higher system uptime, improved user experience, and a significant reduction in operational stress for your team. We’re talking about moving from a reactive firefighting mode to a strategic, proactive posture.
Another huge benefit of Grafana email alerts is their ubiquity and ease of access. Almost everyone has an email client readily available on their phone, laptop, or desktop. This means your team can receive critical notifications wherever they are, without needing to be constantly logged into Grafana or checking a specific internal tool. It’s a low-barrier-to-entry notification method that ensures broad reach. Plus, email provides a reliable and auditable trail of alerts, which can be super helpful for post-mortem analysis and compliance. You can easily forward alerts, create filters, and integrate them into existing incident management workflows. The flexibility of email as a notification channel, especially when powered by Grafana’s robust alerting engine, makes it an indispensable tool in your monitoring arsenal. Whether it’s a server running out of disk space, an application error rate exceeding a threshold, or a sudden drop in website traffic, Grafana email alerts ensure that the right people are informed at the right time. This capability doesn’t just save you from potential disasters; it empowers your team to maintain peak performance, understand their systems better, and ultimately, deliver a more reliable service. So, yeah, calling them a monitoring superpower isn’t an exaggeration – it’s a recognition of their profound impact on operational excellence. Trust me, investing time in a solid Grafana email alert setup will pay dividends in peace of mind and system stability. It’s about staying ahead, folks, not just catching up after the fact.
Getting Started: Prerequisites for Grafana Email Alerting
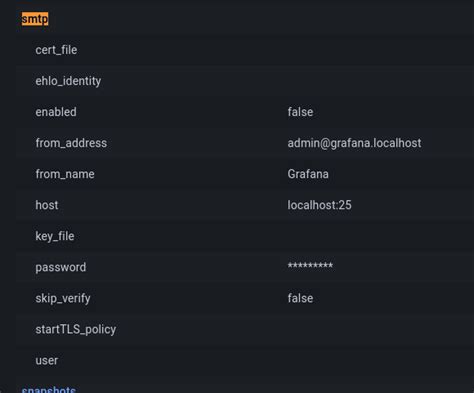
Alright, before we jump into the nitty-gritty of configuring your Grafana email alerts , let’s talk about the foundational stuff. You wouldn’t try to build a house without a solid foundation, right? The same goes for setting up reliable alerts. There are a few key prerequisites you need to have in place to ensure your email alert setup goes smoothly and, more importantly, that your alerts actually work when they’re supposed to. First and foremost, you need a working Grafana instance . This might sound obvious, but ensuring your Grafana installation is up-to-date and running without any issues is critical. If Grafana itself isn’t stable, your alerts won’t be either. Beyond the basic installation, you also need to have your data sources configured and functioning correctly . Remember, Grafana alerts are triggered by data flowing from your data sources (like Prometheus, InfluxDB, PostgreSQL, etc.). If your data sources aren’t connected or are failing to fetch data, Grafana won’t have anything to evaluate, and thus, no alerts will be sent. So, double-check that your dashboards are displaying live, accurate data before you even think about setting up an alert.
Next up, and this is a big one for
Grafana email alerts
: you need an
SMTP server
. SMTP (Simple Mail Transfer Protocol) is the engine that sends your emails. Grafana doesn’t send emails directly; it relies on an external SMTP server. This could be your organization’s internal mail server, a cloud-based email service like SendGrid, Mailgun, or AWS SES, or even a public service like Gmail’s SMTP (though for production, a dedicated service is usually better). You’ll need the following details for your SMTP server: the
host address
, the
port number
(commonly 587 for TLS or 465 for SSL, or 25 for unencrypted), a
username
, and a
password
. If your SMTP server requires SSL/TLS encryption (which most do and should!), you’ll need to know that too. Some SMTP servers might also require
skip_verify
to be set to
true
if they use self-signed certificates, but it’s generally best practice to use properly signed certificates. Ensure that the Grafana server has network access to this SMTP host and that no firewalls are blocking the necessary ports. Without a properly configured SMTP server, your
Grafana email alert setup
will essentially be an alert-generating machine with no way to deliver its messages. So, before you open up Grafana’s UI, make sure you have all these SMTP credentials and network configurations ready. It’s the backbone of your email notifications, folks, and getting it right from the start will save you a lot of troubleshooting headaches down the line. Finally, ensure the Grafana user setting up the alerts has the necessary
permissions
. Typically, an
Admin
role is needed to configure notification channels globally, but
Editor
roles can often create alert rules on their own dashboards. Having these ducks in a row ensures a smooth and successful deployment of your
Grafana email alerts
.
Step-by-Step: Configuring Grafana Email Alert Channels
Alright, folks, now that we’ve got our prerequisites sorted – our Grafana instance is humming, data sources are flowing, and we’ve got our SMTP server details handy – it’s time to dive into the core of your
Grafana email alert setup
: configuring the notification channels. This is where you tell Grafana
how
and
where
to send your alerts. It’s a pretty straightforward process once you know where to look. First off, log into your Grafana instance as an administrator. You’ll want to navigate to the
Alerting
section, which is usually found on the left-hand sidebar. Once you click on ‘Alerting’, you’ll see a sub-menu, and one of the options there will be
Notification channels
. Go ahead and click that. This page lists all your existing notification channels and allows you to add new ones. To create a new
email alert channel
, click the
New channel
button.
On the
New channel
page, you’ll be presented with a form to fill out. The first thing you’ll need to do is give your channel a
Name
. Make it descriptive, something like
Ops Team Email Alerts
or
Critical DB Alerts
. This helps you easily identify the channel later when attaching it to specific alert rules. Next, under
Type
, you’ll select
Email
from the dropdown menu. This tells Grafana that this channel is specifically for sending emails. Now comes the part where we input our SMTP server details we prepared earlier. You’ll see fields for
Addresses
,
Subject
,
Host
,
Port
,
User
, and
Password
. In the
Addresses
field, enter the email addresses you want to receive these alerts, separated by semicolons (e.g.,
ops@example.com; sre@example.com
). For the
Subject
, you can customize the email subject line – using variables like
{{.AlertName}}
can make it very dynamic and informative. Then, fill in your
Host
(e.g.,
smtp.sendgrid.net
),
Port
(e.g.,
587
),
User
, and
Password
for your SMTP server. Pay close attention to the
Use TLS
and
Skip TLS Verify
options. Most modern SMTP servers require
Use TLS
to be enabled for secure communication.
Skip TLS Verify
should generally be left unchecked unless you absolutely know you’re dealing with a self-signed certificate in a controlled environment – for production, you want proper certificate validation.
After filling out all the necessary fields, don’t just hit save yet! The most crucial step here is to
test your notification channel
. There’s a
Send Test
button (or similar) at the bottom of the form. Clicking this will send a test email through your configured SMTP server to the specified
Addresses
.
Always
do this. If the test email doesn’t arrive, you know there’s an issue with your SMTP configuration (wrong host, port, credentials, firewall, etc.) before you even set up an alert rule. This saves you a ton of frustration later. Once the test email successfully lands in your inbox, you can confidently click
Save
to create your
Grafana email alert
notification channel. You can create multiple email channels for different teams or alert severities. This modularity is a powerful feature, allowing for highly targeted
email alert setup
strategies. Remember, getting this step right is paramount, as it’s the bridge between your system’s critical data and your team’s immediate awareness. This robust configuration ensures that every alert you define will find its way to the intended recipients reliably and securely.
Crafting Your Alert Rules: When, What, and Who Gets Notified
Now that you’ve got your notification channels all set up and tested – congrats, you’re halfway there! – it’s time for the really exciting part of your
Grafana email alert setup
:
crafting the actual alert rules
. This is where you define the specific conditions that will trigger an alert, essentially telling Grafana, “Hey, if
this
happens, let me know!” Grafana’s alerting engine is incredibly flexible, allowing you to create rules directly on your dashboard panels. This is super intuitive because you’re literally building alerts based on the visualizations you’re already familiar with. To start, navigate to a dashboard that contains the metrics you want to monitor. Find the panel you want to alert on and click on its title, then select
Edit
. Within the panel editor, you’ll usually find an
Alert
tab (sometimes labeled
Alerting
or indicated by a bell icon). Click on this tab to begin defining your rule.
The first thing you’ll do is create a
new alert rule
. Give it a descriptive name that clearly indicates what it’s monitoring, like
High CPU Usage on Web Server
or
Database Connection Errors Exceed Threshold
. Then, you’ll define the
query
that the alert will evaluate. This query is often pre-filled from your panel’s existing query, but you can adjust it specifically for the alert. The magic happens in the
conditions
section. This is where you specify the thresholds that, when crossed, will put your alert into a
Pending
or
Firing
state. You can choose from various evaluation functions like
last()
,
min()
,
max()
,
avg()
,
sum()
, and
count()
. For example, you might say
WHEN avg() OF query(A, 5m) IS ABOVE 80
. This means if the average of the metric from query A over the last 5 minutes is greater than 80, the condition is met. You can add multiple conditions and combine them with
AND
or
OR
logic for more complex scenarios.
Crucially, you also need to set the
evaluation frequency
and
For
duration
. The frequency tells Grafana how often to check the conditions (e.g.,
Every 1m
). The
For
duration is extremely important for preventing alert fatigue due to transient spikes. If you set
For 5m
, the alert condition must remain true for a full 5 minutes
before
the alert status changes to
Firing
. This means a brief, harmless spike won’t immediately trigger an email. After defining your conditions, you’ll scroll down to the
Notifications
section. Here, you’ll select the
email alert channels
you configured earlier. You can choose one or multiple channels. This is also where you can customize the alert message. Grafana supports templating, so you can use variables like
{{.AlertName}}
,
{{.State}}
,
{{.Value}}
, and
{{.Tags}}
to create highly informative messages that provide context directly in the email. A well-crafted message can significantly reduce the time it takes for your team to understand and address an issue. Don’t forget to set up options for
No Data
and
Error
handling. Should Grafana send an alert if it can’t get data from your source, or if the query errors out? These are important considerations for a robust
Grafana email alert setup
. Finally, review everything and hit
Save
or
Apply
. Your new
Grafana email alert
rule is now active, diligently monitoring your systems and ready to notify the right people through the right channels. This meticulous approach to rule creation is what transforms raw data into actionable insights, making your monitoring truly intelligent.
Best Practices for Effective Grafana Email Alerting
Okay, folks, you’ve mastered the Grafana email alert setup – you know how to configure channels and craft rules. But here’s the kicker: simply having alerts isn’t enough. To truly unlock the power of Grafana email alerts , you need to implement them intelligently. Without best practices, you risk falling into the trap of alert fatigue , where your team gets so many notifications that they start ignoring them, defeating the whole purpose of monitoring. So, let’s talk about how to make your Grafana email alerts not just functional, but genuinely effective and valuable. First off, a golden rule: Focus on actionable alerts . Every alert you send should represent a problem that requires human intervention or investigation. If an alert fires and your team consistently says, “Yeah, that happens sometimes, it’s fine,” then that alert is probably noise and should be re-evaluated, silenced, or removed. Don’t alert on things that don’t matter or can’t be acted upon. Think about what truly impacts your service or users.
Next,
be precise with your alert conditions and thresholds
. This goes back to using the
For
duration effectively. A momentary spike in CPU usage might be normal, but sustained high usage is a problem. Setting a
For
duration of, say, 5 or 10 minutes prevents transient issues from spamming your inbox. Also, periodically review and fine-tune your thresholds. What was a critical threshold six months ago might be normal operating procedure today, or vice-versa. Your monitoring should evolve with your systems.
Clear, concise, and contextual messages
are also paramount for
Grafana email alerts
. An email that simply says
Alerting: CPU High
isn’t very helpful. Instead, aim for messages like
Alerting: High CPU Usage on webserver-01 (85% for 10 min) - impact to customer portal likely. Link: [Grafana Dashboard Link]
. Including relevant metrics, the duration of the issue, potential impact, and a direct link back to the Grafana dashboard for deeper investigation empowers your team to react quickly without guessing. Use Grafana’s templating features extensively for this.
Consider implementing
notification routing based on severity or team responsibility
. Instead of sending
all
alerts to
everyone
, create different
email alert channels
for
Critical Alerts (Ops Team)
,
Warning Alerts (Dev Team)
,
Informational Alerts (Everyone)
. This ensures that only the relevant people are bothered by a specific type of issue, reducing noise for others. Additionally, don’t forget about
silencing and pausing alerts
. If you know you’re doing planned maintenance or an upgrade that will intentionally trigger certain alerts, silence them temporarily in Grafana. This prevents unnecessary notifications and helps maintain trust in the alerting system. Lastly,
regularly review your alert rules
. Are they still relevant? Are there any alerts that consistently fire but are never acted upon? Are there critical metrics you
aren’t
alerting on? Schedule quarterly or semi-annual
alert review
sessions with your team. This practice helps keep your
Grafana email alert setup
lean, accurate, and highly effective. By following these best practices, you’ll transform your
Grafana email alerts
from a potential source of frustration into a powerful, reliable ally in maintaining the health and stability of your systems. It’s all about working smarter, not just harder, when it comes to monitoring and incident response.
Conclusion: Empowering Your Monitoring with Grafana Email Alerts
And there you have it, folks! We’ve journeyed through the entire process of setting up and optimizing your Grafana email alerts . From understanding the sheer power they bring to your monitoring strategy to meticulously configuring your notification channels and crafting smart, actionable alert rules, you’re now equipped with the knowledge to make your Grafana instance truly shine. We started by emphasizing that dashboards, while invaluable for visualization, are fundamentally reactive. The true magic happens when you pair those insights with a proactive notification system. That’s precisely where Grafana email alerts step in, transforming your monitoring from a passive observation into an active, protective shield for your systems. By ensuring that critical information reaches the right people at the right time, email alerts empower your team to react swiftly, minimize downtime, and maintain the highest levels of service availability. This proactive stance isn’t just about fixing problems faster; it’s about preventing them from escalating, ultimately leading to more stable operations and happier users.
We covered the essential prerequisites, stressing the importance of a robust Grafana setup, healthy data sources, and, of course, a reliable SMTP server – the unsung hero behind every successful email notification. Getting those foundational elements squared away is non-negotiable for a dependable
Grafana email alert setup
. Then, we walked through the step-by-step process of creating notification channels, highlighting the critical
Send Test
feature to validate your configurations before going live. This simple yet crucial step can save you countless hours of troubleshooting down the line. We delved into the art of crafting effective alert rules directly on your dashboard panels, emphasizing the use of
For
durations to prevent alert fatigue and the power of templated messages to provide immediate context to your team. Finally, we wrapped up with a comprehensive look at best practices – focusing on actionable alerts, precise thresholds, clear communication, intelligent routing, and regular reviews. These aren’t just suggestions; they’re the strategies that elevate your
Grafana email alerts
from mere notifications to indispensable tools for operational excellence.
Remember, your monitoring system is only as good as its ability to inform you when something goes wrong. By mastering your Grafana email alert setup , you’re not just adding a feature; you’re building resilience, fostering a proactive culture, and empowering your team with the insights they need to keep everything running smoothly. So go forth, configure those alerts, and enjoy the peace of mind that comes with knowing your Grafana instance is diligently watching over your infrastructure, ready to send you that all-important email the moment it detects an anomaly. Happy monitoring, everyone! Let’s keep those systems healthy and those inboxes meaningfully pinging.
